
Hello Sitecore Folks,
In this blog, we learn about how we can connect Sitecore CDP with your Next.js application. But before going deep into that, let’s talk about Sitecore CDP and why it is used.
Sitecore CDP
Sitecore CDP stands for Customer Data Platform . Sitecore CDP is a customer data platform designed to unify customer data across channels for personalized experiences and insights, enhancing marketing strategies and customer engagement. For more Information you can read Here .
Setup Sitecore CDP
As we know about CDP lets see how we can connect with out next js application .
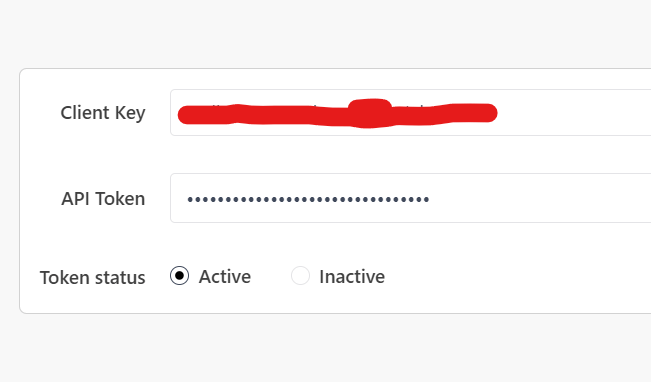
For connecting any Application we need there API access that is there “CLIENT KEY” and “API TOKEN” for connecting to your next application
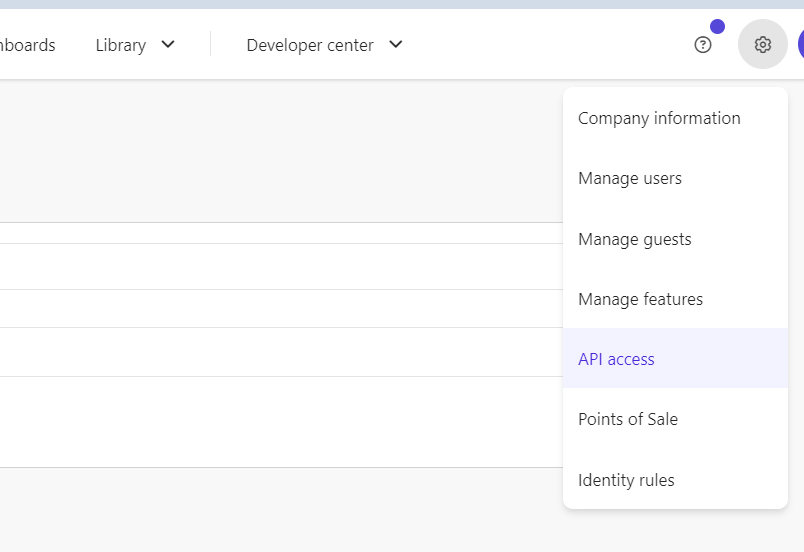
Login to your Sitecore CDP account. Click on the Setting Icon => API access. This will open a page where you have details for access token.
Lets create point of sale. Click on the Setting Icon => point. This will open a page where you can create point of sale
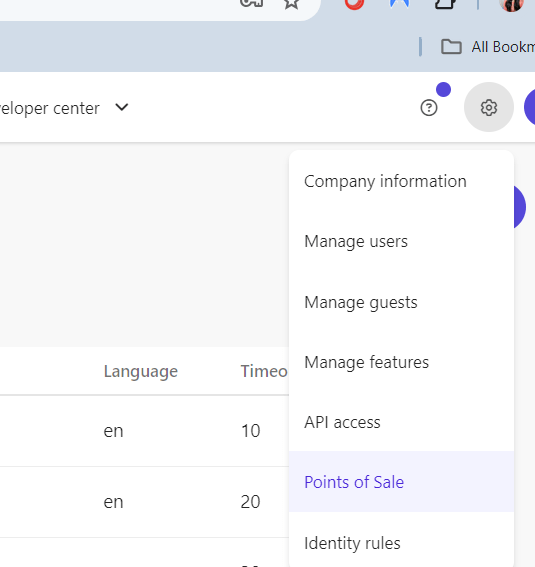
For creating Point of Sale you can refer Sitecore documentation for this .
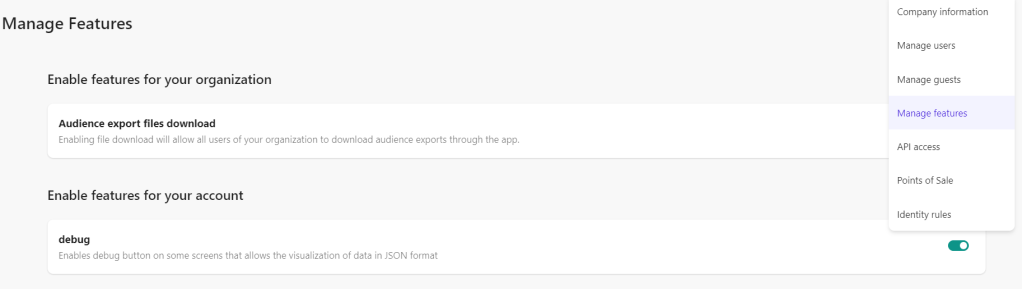
Debug mode enables visibility of all data and configuration stored in Sitecore CDP. It will give us access to additional information for requests. To enable debug mode, Click on setting Icon => Manage Features. This will open a page where you can enable debug mode .
To be able to send Identity event to Sitecore CDP, we need to know the identity rules for our organization tenant. To verify that information we should navigate to system setting => Company information .

Click icon next to save button, This will open a pop-up click on Show as Json top right corner and then locate the identityIndexConfigurations JSON object.
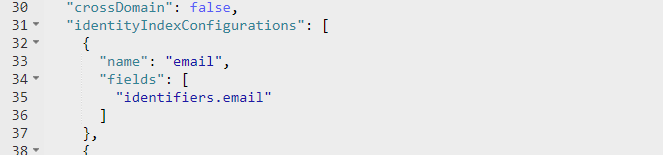
These are the identity rules for our organization’s tenant. In this case the organization is using one identity rule: email. That means that when we will be sending IDENTITY event to Sitecore CDP it should contain a value for email attribute to identify a guest.
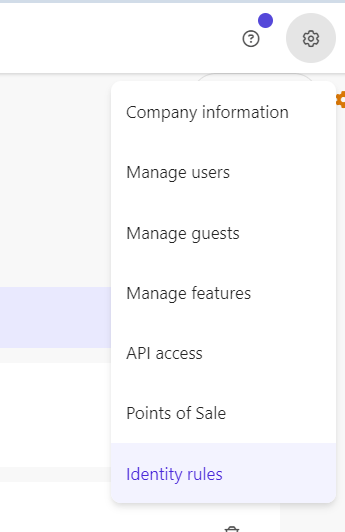
You can find these rules on identity rules page . Click on setting icon => identity rules
Connect with next application
Lets connect Sitecore CDP with next application .
If you are new to next js , you can learn and setup your next application from here .
Once you setup your next setup lets install sitecore/engage package to connect your CDP application
Go to code editor and run this command .This will install sdk for connecting sitecore CDP
npm install @sitecore/engageLet’s create a js file where we can store details for configuration . You can create file named “engage.js” under Pages/api folder.
import { init } from "@sitecore/engage";

let engage;

const loadEngage = async () => {
  engage = await init({
    clientKey: "<client_key_PLACEHOLDER>",
    targetURL: "<stream_api_target_endpoint_PLACEHOLDER>",
    pointOfSale: "<point_of_sale_PLACEHOLDER>",
    cookieDomain: "<cookie_domain_PLACEHOLDER>",
    cookieExpiryDays: 365,
    forceServerCookieMode: false,
    includeUTMParameters: true,
    webPersonalization: false /* boolean or object. See Settings object for all options. Default: false */
  });
};

loadEngage();
export { engage };
You need to replace your CDP setting value to placeholder in this js which we have setup in starting of this blog . you can get more details here .
Let’s understand how this js file works :
- this will initialize your INIT function as it Imports the
init()function from the@sitecore/engagepackage. - Asynchronously loads the Engage API using details about your Sitecore CDP instance and sets cookies from the client.
- Exports your instance of the Engage API as a variable called
engage. - Here you can also use your environment variable so that you can you different variable for different environment.
Let’s use this js and send VIEW event to your CDP because the VIEW event triggers every time your webpage loads.
Let’s go to pages/index and in the Home function, call the engage.pageView() function to send VIEW event data
import { useEffect } from "react";
import { engage } from "./api/engage";

export default function Home() {
  useEffect(() => {
    if (engage !== undefined) {
      sendPageViewEvent();
    };
  }, []);

  const sendPageViewEvent = async () => {
    const response = await engage.pageView({
      channel: "<channel_PLACEHOLDER>",
      currency: "<currency_PLACEHOLDER>"
    });

    // For testing and debugging purposes only
    if (response) {
    console.log("Copy-paste the following line into Sitecore CDP > Guests > Search field:");
      console.log("bid:", engage.getBrowserId());
    };
  };
}
You need to replace your CDP setting value to placeholder in this file which we have setup in starting of this blog . You can find currency value in company information under setting section. you can get more details here .
Let’s understand how this code works:
This code utilizes the useEffect hook to trigger a side effect when the component mounts. If the engage function is defined (not undefined), it calls the sendPageViewEvent function.
The sendPageViewEvent function is an asynchronous function that sends a page view event using the engage.pageView function. It passes an object with channel and currency . After sending the event, it logs a message for testing and debugging purposes. This message includes a line that can be copied and pasted into Sitecore CDP, containing the browser ID retrieved using engage.getBrowserId().
npm run dev Run this command in terminal , this will run your next app and send event data to your cdp
Verify Data in Guest List
In the home function, we have a console log displaying the browser ID of this event , copy this text similar to :
bid: 0a8eb033-7d7b-48b7-9256-3f583bcaf4d1
Tip
This text consists of the
bid:prefix plus a browser ID.In Sitecore CDP, to find your users by the browser ID, always use the
bid:prefix plus the browser ID notation. For example:bid: 0a8eb033-7d7b-48b7-9256-3f583bcaf4d1
Go to your CDP site, go to guests and search bid

You can click on name and view details of this guest
In the event editor , you can see VIEW event , This will connect you CDP to your Next app
Conclusion
In conclusion, the integration of Sitecore CDP with Next.js presents a powerful opportunity to elevate your digital experiences to new heights. By seamlessly connecting customer data across channels and leveraging the flexibility and performance of Next.js, businesses can deliver highly personalized and engaging experiences to their users.
Through this blog post, we’ve explored the importance of Sitecore CDP as a unified platform for managing customer data and discussed how integrating it with Next.js can unlock a wealth of possibilities for marketers and developers alike.
Whether you’re looking to streamline your marketing efforts, gain deeper insights into customer behavior, or deliver more immersive digital experiences, the combination of Sitecore CDP and Next.js provides a solid foundation to achieve your goals.
As you embark on your journey to integrate Sitecore CDP with Next.js, remember to leverage the rich documentation and resources available to you. Experiment, iterate, and tailor your implementation to suit the unique needs of your business and audience.
With the right strategy and execution, the integration of Sitecore CDP with Next.js has the potential to drive meaningful results and transform the way you engage with your customers online. Embrace the possibilities, and let your imagination soar as you harness the power of these two innovative technologies.
References
- https://blogs.perficient.com/2022/08/17/connecting-sitecore-cdp-to-next-js-website/
- https://doc.sitecore.com/cdp/en/developers/api/integrate-engage-sdk-nextjs-client-side.html
- https://doc.sitecore.com/cdp/en/developers/api/collect-required-details.html
Happy Coding 😊


Leave a comment