
Hello Folks ,
In this blog, we will delve into the process of sending IDENTITY events to your Customer Data Platform (CDP) using Next.js.
If you are new to CDP and next , you can follow my blog for setting CDP with next js.
Let’s start with creating a page in next js where we will update our code to send IDENTITY event .
If you are new to next , you can learn here how to create pages in next
Let’s create a form page under the ‘pages’ directory and copy the code below.
import { useState } from "react";
import { engage } from "./api/engage";

export default function Form() {
    const [email, setEmail] = useState("");

    const handleEmail = (e) => {
        setEmail(e.target.value);
    };

    const handleSubmit = async (e) => {
        e.preventDefault();

        const eventData = {
          channel: "WEB",
          currency: process.env.CURRENCY,
          pointOfSale: process.env.POC,
          language: "EN",
          page: "form",
          email,
          identifiers: [
              {
                  id: email,
                  provider: "BXLP"
              }
          ]
        };

        const extensionData = {
            DataBaseID: "123"
        };

        // Send IDENTITY event to Sitecore CDP
        await engage.identity(eventData, extensionData);
        alert("Your Guest is created");
    };

    return (
        <form onSubmit={handleSubmit}>
            <label>
                <span>Email:</span>
                <input type="email" required onChange={handleEmail} value={email} />
            </label>

            <button type="submit">Subscribe</button>
        </form>
    )
};
Let’s deep dive and understand how this code works.
In this code, we’ve created a form with an email input field. When the user types in their email and clicks submit, the value of the email is sent to the handleSubmit function.
In the handleSubmit function, we create two objects: eventData and extensionData. These objects are then passed to the engage.identity function. This function is responsible for creating a guest in the Customer Data Platform (CDP) using the provided data.
EventData :
In the context of cdp.engage, eventData typically refers to the data related to a specific event or interaction that occurs on a website or application. This data often includes information such as the type of event, timestamp, user details, and any other relevant contextual information.
Event data consists of some properties
- Channel : In this you will define from which channel you want to register this event
- Currency : You can find currency value in company information under setting section. you can get more details here .
- pointofsale : To find the name of your point of sale, in Sitecore CDP, on the navigation pane, click on Setting icon > Points of Sale > Name.
- language :You can find language value in company information under setting section. you can get more details here .
- page : In this you will define from which page you want to register this event
- email,name,title : In this section you can update user details of guest . you can read more here
- identifiers : identifiers are properties that uniquely identify a user or entity. These are array of objects which consist of ID and provider . You can find identity rules on identity rules page in your Sitecore CDP . Click on setting icon => identity rules.
- ID: The unique guest identifier provided by your organization’s identity system, such as a email or Id which uniquely distinguish every guest. This is required field.
- Provider : The name of your organization’s identity system, external to Sitecore CDP, that provided the unique guest identifier such as “BXLP”. This is required field
After configuring eventData we will configure extensionData .
extensionData :
In the context of engage.cdp, extensionData typically refers to additional custom data that can be included along with the main event data when triggering events within the Customer Data Platform (CDP).
Extension data allows you to provide extra context or information that may not be directly related to the main event being tracked but could still be valuable for analysis, segmentation, or personalization purposes.
For example, you want to send database id to specific guest you can send from this data
        const extensionData = {
          DataBaseID: "123"
        };
Sending Data on CDP
once you setup this run your next app .
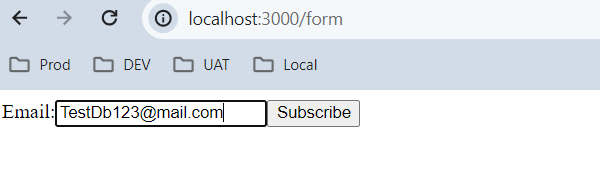
Once your page is up, you can add your email and click subscribe. This action will create a guest in your Customer Data Platform (CDP). You can check guest in GUESTS list in Sitecore CDP

Click on email, this will detail page of this guest where you can see event viewer
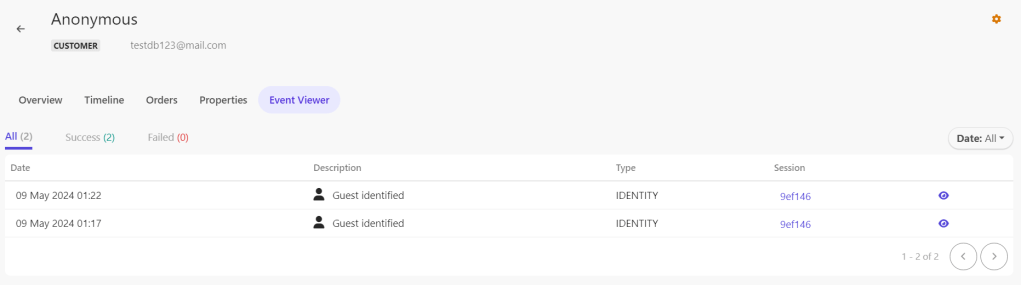
Click on the eye icon to see the details of this event. Once the popup appears, click on the right side and select ‘SHOW AS JSON’. This will display all the values that we have sent through our app.
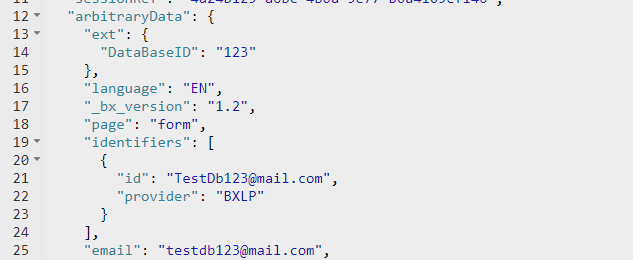
As you can see in the JSON data in the above picture, you can find your custom database ID and identifiers as well.
This action will create a guest in the Customer Data Platform (CDP). You can experiment by sending different properties and observing the data in the CDP.
Conclusion :
Leveraging Next.js provides a seamless way to integrate with Sitecore CDP and send IDENTITY events. By utilizing Next.js’s server-side rendering capabilities and React components, we can easily create forms to collect user data and trigger events upon submission. Through the engage module, we can efficiently send event data to Sitecore CDP, enriching our customer profiles and enabling personalized experiences. With the ability to customize event data and observe the results within the CDP, Next.js empowers developers to create dynamic and data-driven applications that enhance user engagement and drive business growth.
With the right strategy and execution, the integration of Sitecore CDP with Next.js has the potential to drive meaningful results and transform the way you engage with your customers online. Embrace the possibilities, and let your imagination soar as you harness the power of these two innovative technologies.
References
- https://doc.sitecore.com/cdp/en/developers/api/engage-identity.html
- https://doc.sitecore.com/cdp/en/developers/api/identity-event.html
- https://doc.sitecore.com/cdp/en/developers/api/extension-data-object.html
Happy Coding 😊


Leave a comment